Using an AWS Application Load Balancer (ALB). For a production environment it is highly available, scalable, and fully managed load balancing solution.
Architecture with AWS Application Load Balancer (ALB):
                                      Internet
                                         |
                                         |
                           Custom Domain (medical.janakkumarshrestha0.com.np)
                                         |
                                         V
                                  AWS Application Load Balancer (ALB) <-- MANAGED SERVICE
                          (Listens on 80/443, distributes traffic)
                                         |
                                         | (Internal Network / Target Group)
                                         V
                         +-----------------------------------+
                         |                                   |
                  AWS EC2 Instance 1                  AWS EC2 Instance 2
                  (Private IP: 10.0.0.10)             (Private IP: 10.0.0.11)
                  [Dockerized PHP App on 8899]        [Dockerized PHP App on 8899]
                         |                                   |
                         V                                   V
                 (Docker containers)                 (Docker containers)
Prerequisites:
- All your backend EC2 instances are running the application (on localhost), accessible internally on port
8899orYOUR_PORT - All backend EC2 instances are in the same VPC. Ideally, they should be in multiple Availability Zones for higher availability.
- You have own your domain like-
janakkumarshrestha0.com.np.
Step-by-Step Guide for AWS Application Load Balancer (ALB):
Step 1: Prepare Your Backend EC2 Instances
For each of your backend EC2 instances:
- SSH into each instance:
ssh -i /path/to/your/key.pem admin@your_backend_ec2_public_ip - Ensure your application is running:
cd /home/ubuntu/your_project_dir # Your app directory
docker-compose up -d # Ensure containers are running
docker ps # Verify containers are running
curl http://localhost:your_port # Verify app is accessible locally on your app's port
Step 2: Configure Security Groups for Backend Instances
For each of your backend EC2 instances:
- Go to your AWS EC2 Dashboard.
- In the left navigation pane, click “Instances” and select one of your backend EC2 instances.
- In the “Security” tab, click on its associated Security Group.
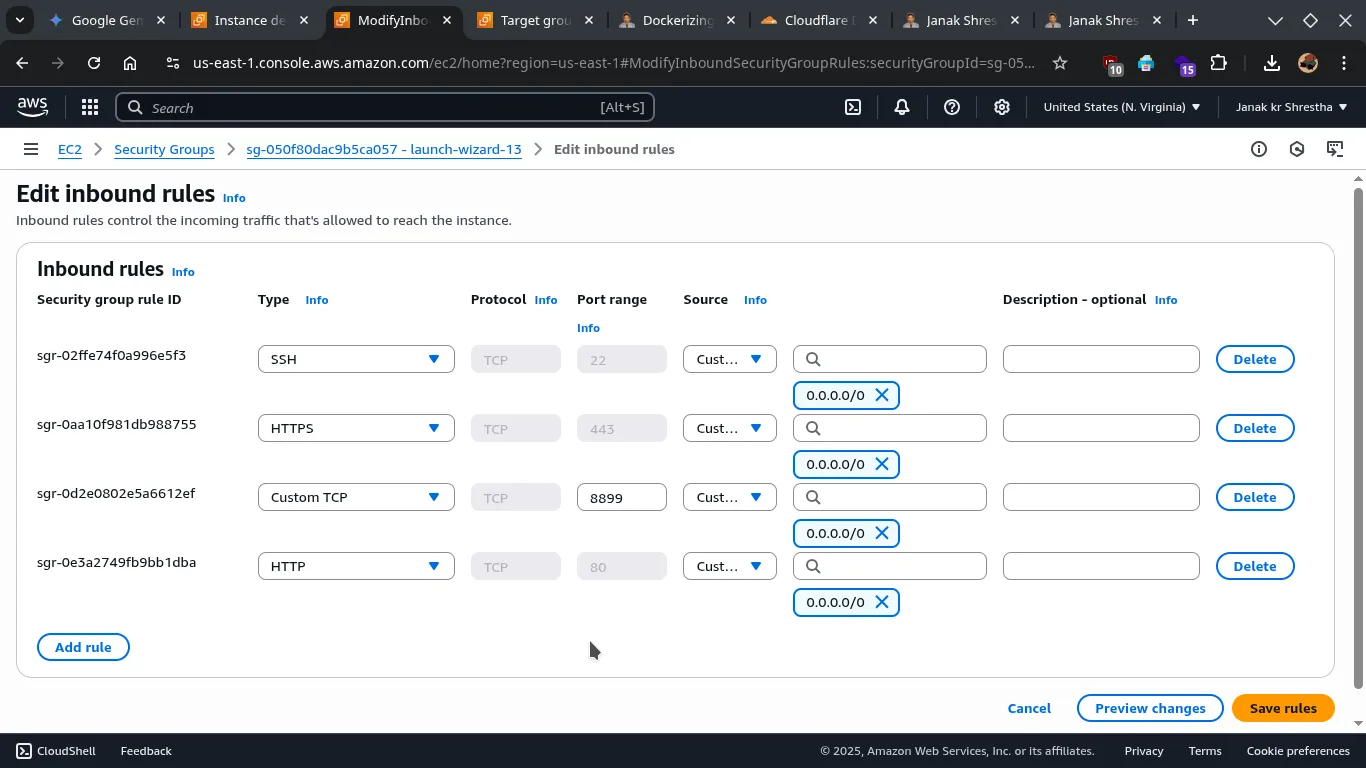
- Click “Edit inbound rules”.
- Add a new rule:
- Type: Custom TCP
- Port range:
8899(Set Your own app’s port). - Source: For now, you can temporarily set this to
0.0.0.0/0for initial testing of the ALB setup (though not recommended for long-term). However, the best practice is to restrict this. Once you create your ALB’s Security Group (in Step 3), you will edit this rule again and set the source to the Security Group ID of your ALB.
- Make sure you have this four inbound rule:
Step 3: Create an AWS Application Load Balancer (ALB)
-
Go to the EC2 Dashboard in the AWS console.
-
In the left navigation pane, under “Load Balancing,” click on Load Balancers.
-
Click Create Load Balancer.
-
Choose Application Load Balancer and click Create.
-
Configure Load Balancer
- Load balancer name:
medical-app-alb(or a name of your choice). - Scheme:
internet-facing. - IP address type:
ipv4. - VPC: Select the VPC where your backend EC2 instances reside.
- Availability Zones: Select all Availability Zones (preferably all zones where your backend instances are located). This is crucial for ALB’s high availability.
- Load balancer name:
-
Configure Security Groups
- Default security group is fine or create new.
- Click Create a new security group.
- Security group name:
medical-alb-sg(or a name of your choice). - Description: Allows HTTP/HTTPS traffic to the ALB.
- Inbound rules:
- Add a rule: Type: HTTP, Port Range: 80, Source: 0.0.0.0/0
- Add a rule: Type: HTTPS, Port Range: 443, Source: 0.0.0.0/0
- Crucial: Note down the Security Group ID of this new ALB security group. You will need it to update your backend instance security groups.
-
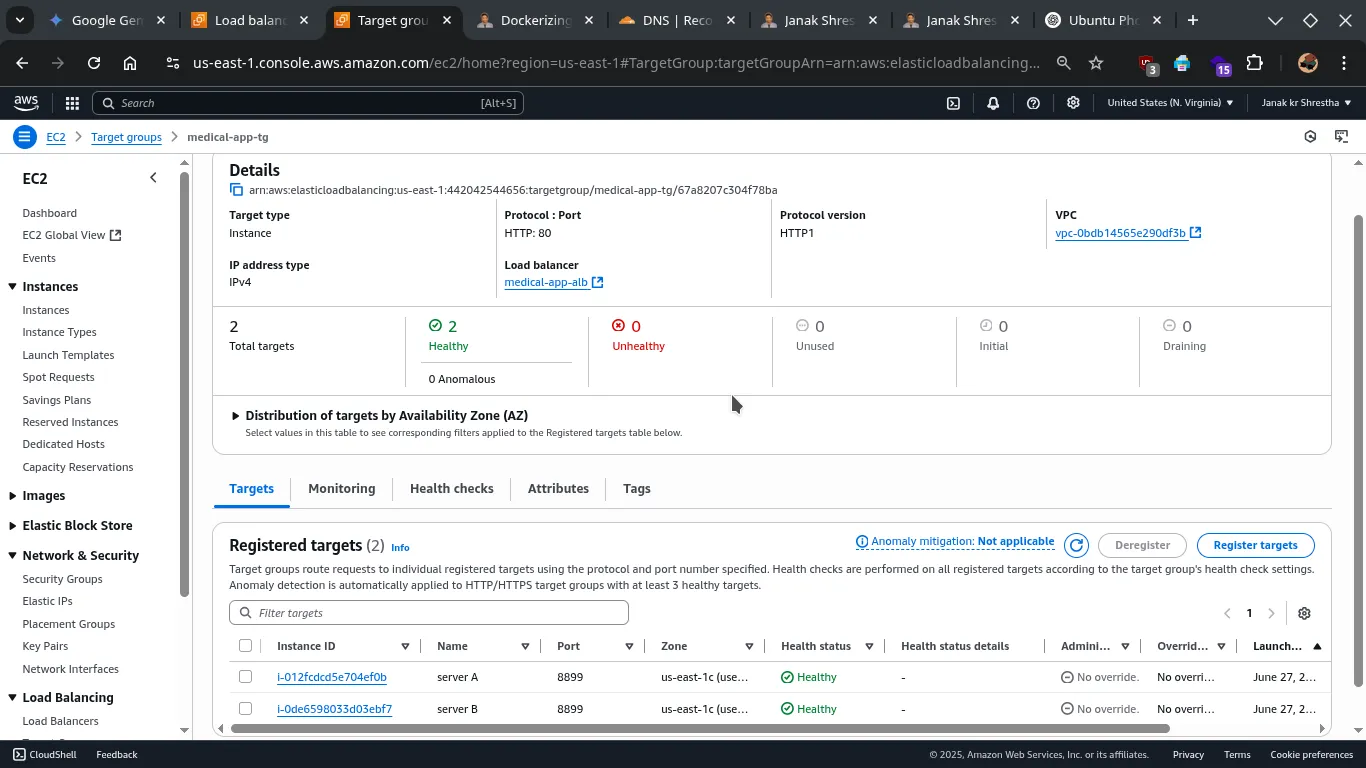
Configure Routing (Target Group)
- Target group: click Create target group.
 * Target group name:
 medical-app-tg (or a name of your choice).
* Target type: Instances.
* Protocol: HTTP.
* Port: 80 (This is the port your app listens on internally on each EC2 instance).
* Leave other option as default.
* Click Next.
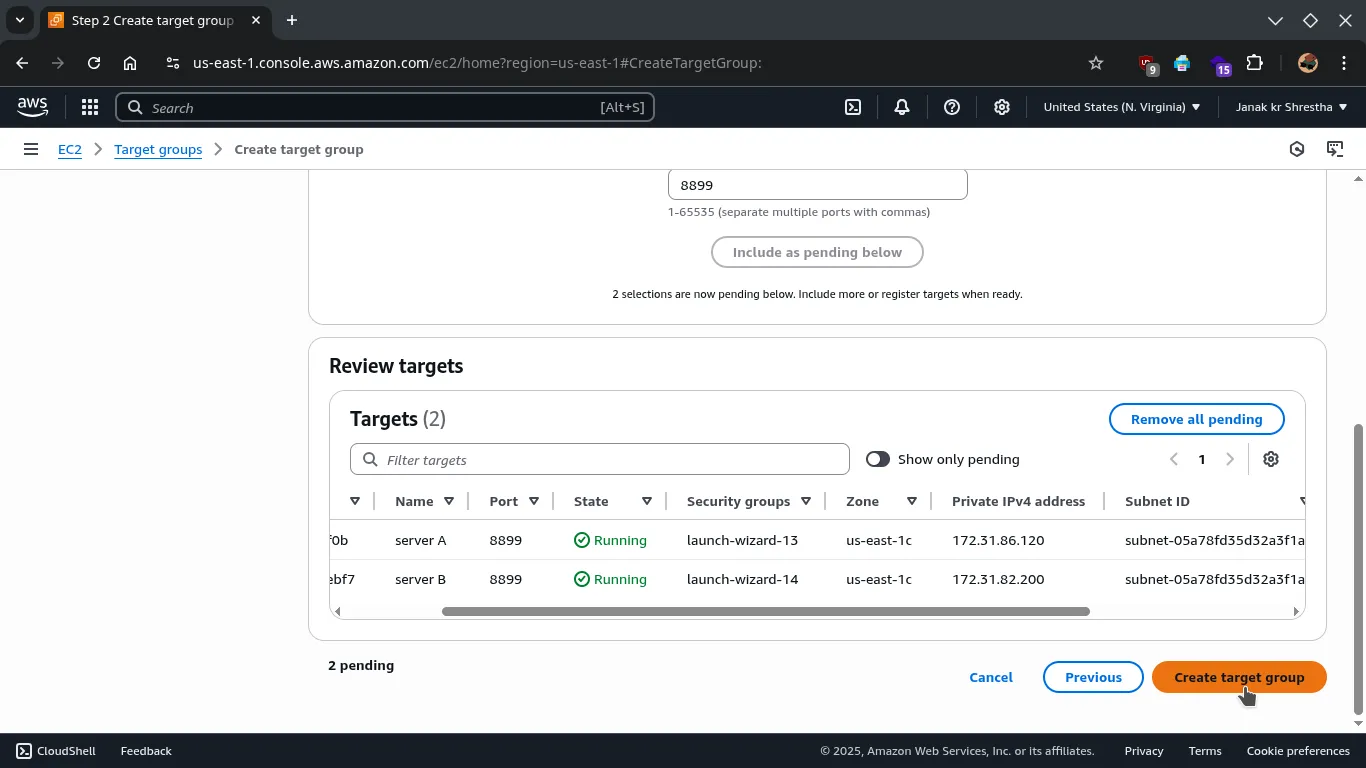
- Register Targets
- Select all your backend EC2 instances from the “Available instances” list.
- Ensure the Port listed for each instance is
8899. - Click Include as pending below.
- Click Create Target Group.
-
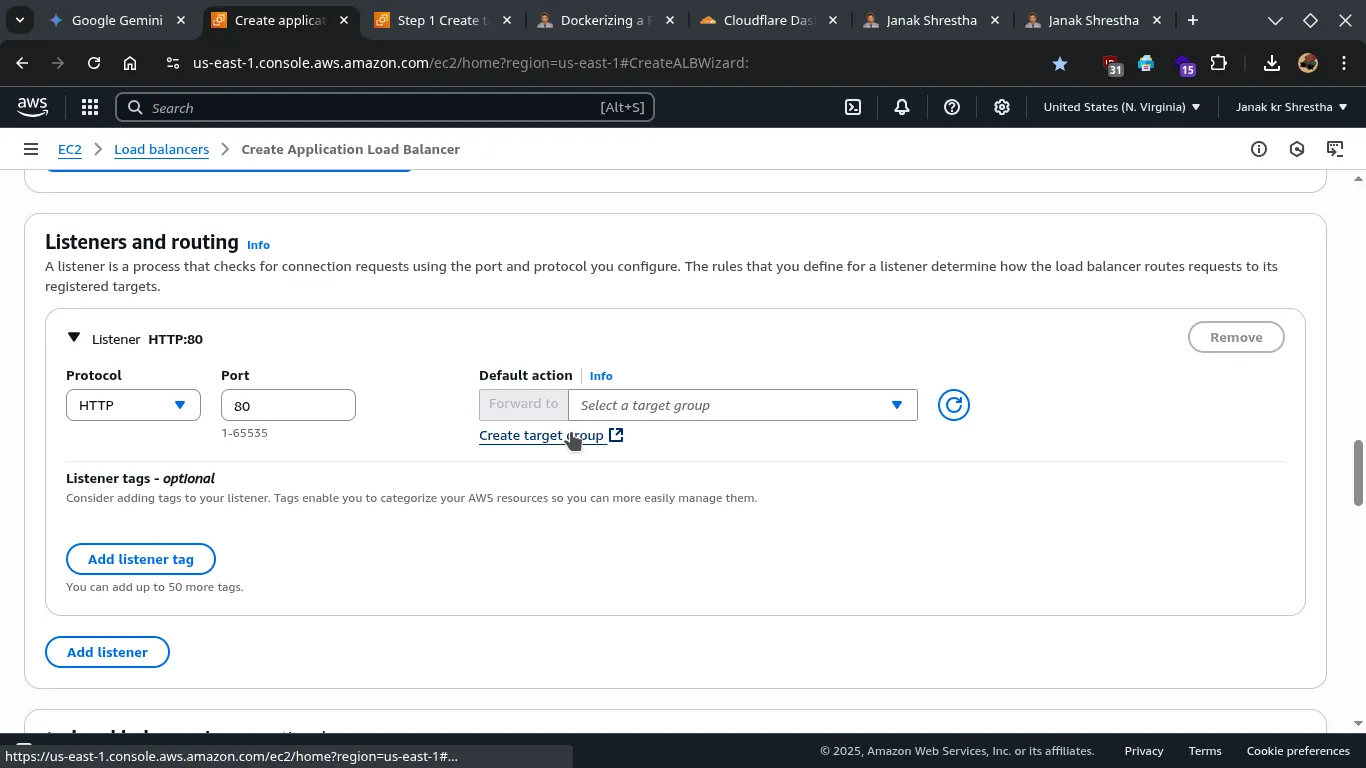
- Listeners and routing:
- By default,
HTTP: 80will be listed. - select target group, click reload icon and select your target group.
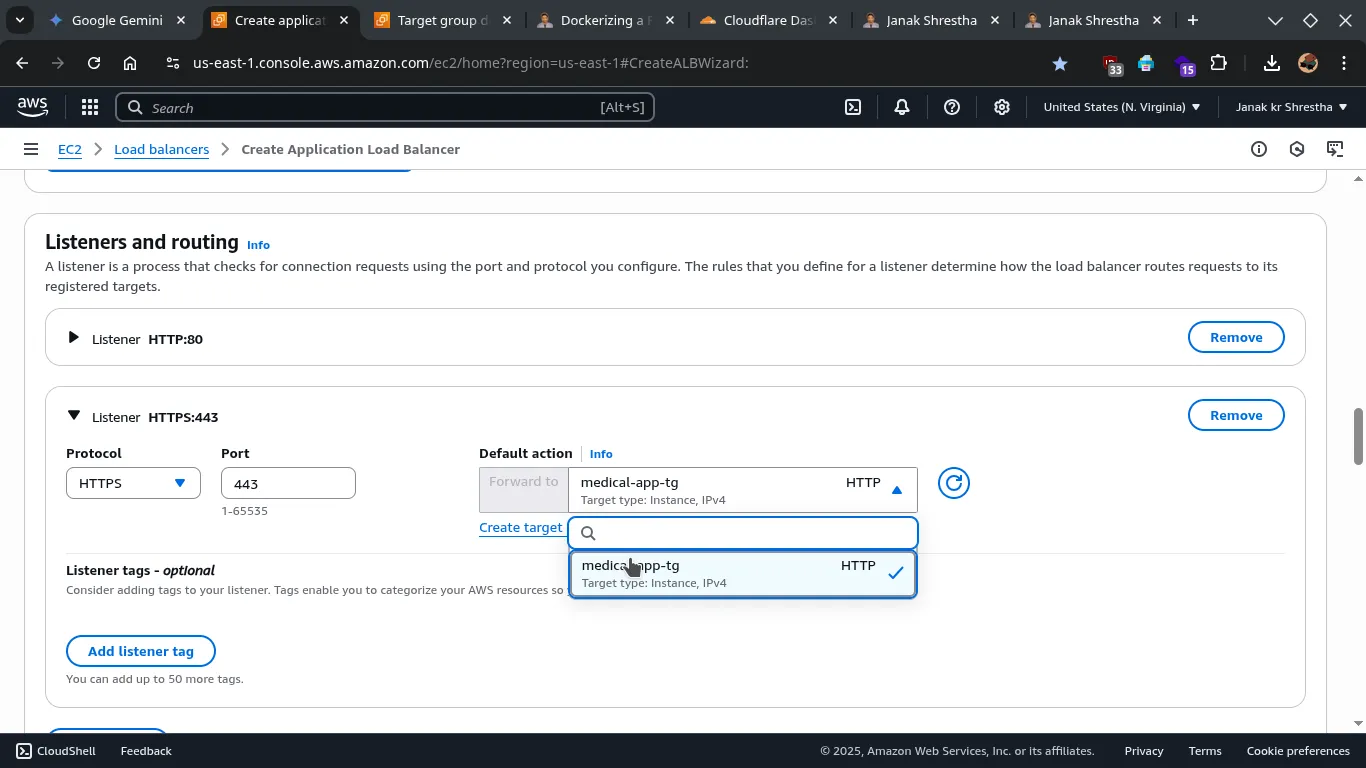
- Click Add listener and add
HTTPS: 443. - Again select target group, click reload icon and select your target group.
- By default,
- Listeners and routing:
-
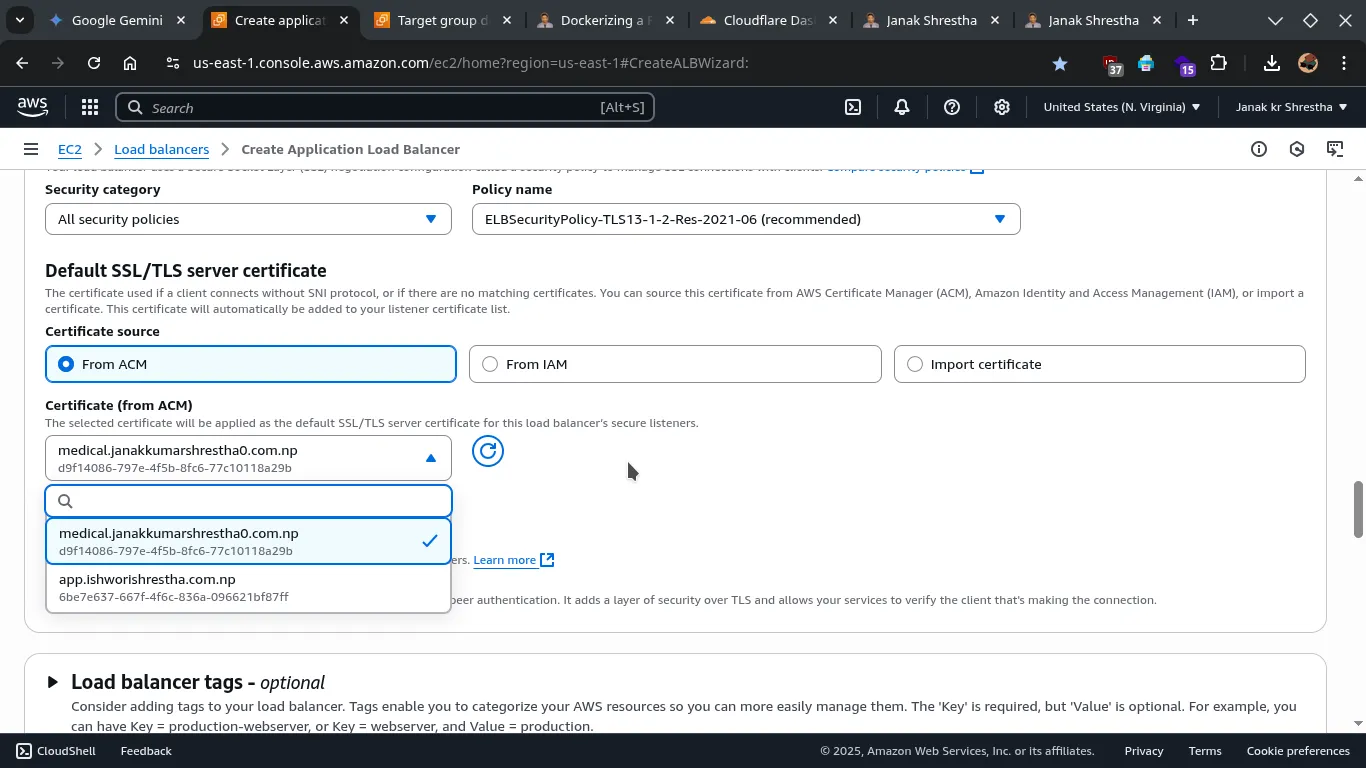
- Secure listener settings: SSL Certificate (for HTTPS: 443 Listener):
- Choose From ACM (recommended).
- If you don’t already have an SSL certificate for your domain like
medical.janakkumarshrestha0.com.npin AWS Certificate Manager (ACM), click “Request a new ACM certificate” and follow the prompts to create a new Public Certificate. This usually involves DNS validation (adding a CNAME record to your DNS). Follow this guide: Request a new ACM certificate - Once the certificate is issued in ACM or already have it, refresh and select it from the dropdown.
- Security Policy: Stick with the default (or recommended).
- Secure listener settings: SSL Certificate (for HTTPS: 443 Listener):
- Review and Create Application Load Balancer
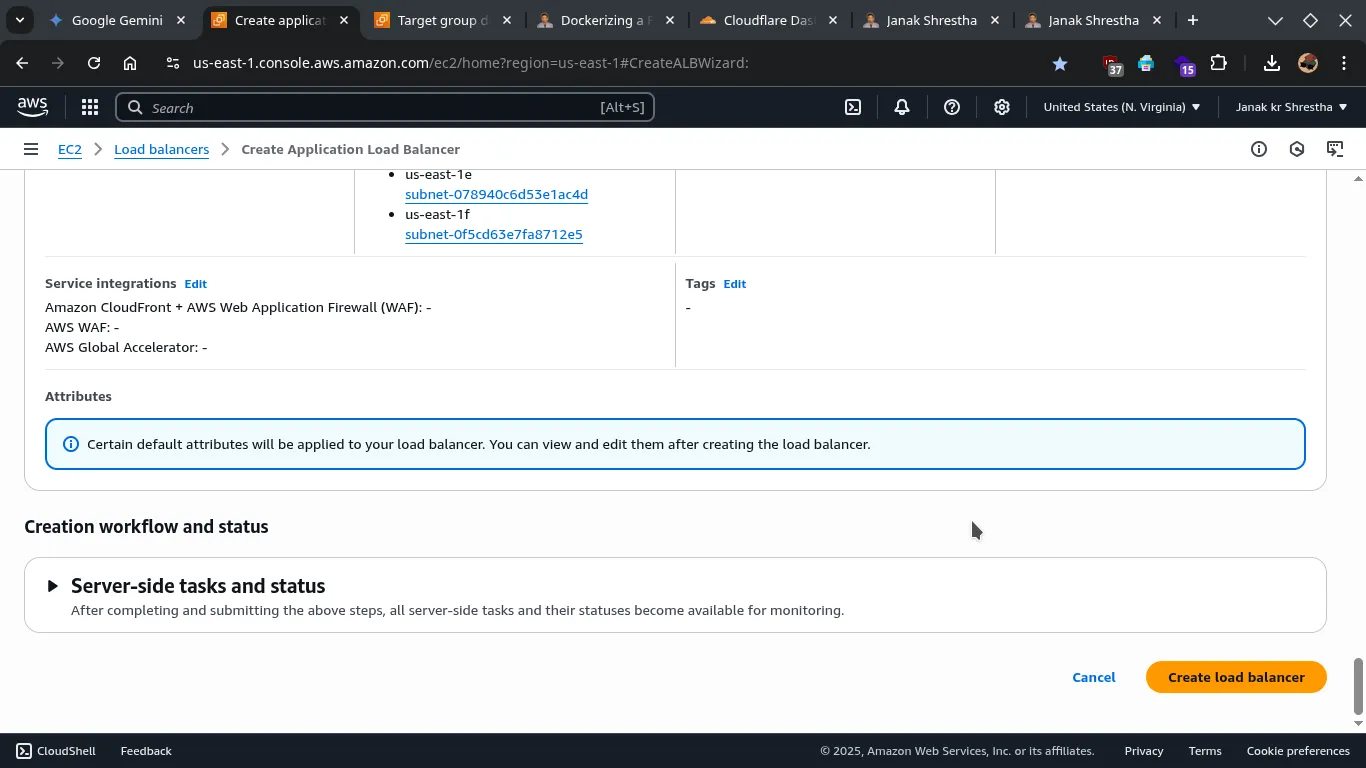 * Review all your settings carefully.
* Click Create load balancer.
* Review all your settings carefully.
* Click Create load balancer.
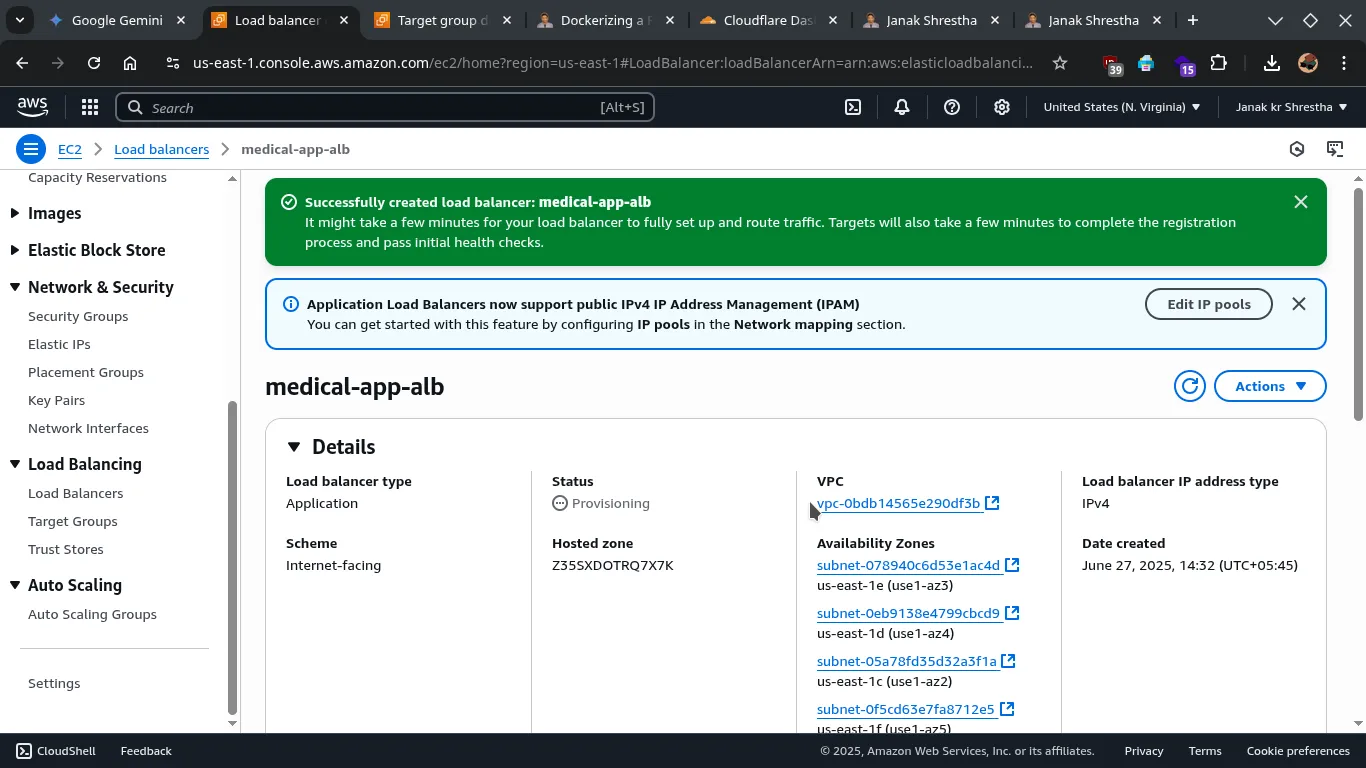
Wait a few minutes for the ALB to provision and become active. You can monitor its state in the Load Balancers section.
Step 5: Add DNS Records (Route 53 Recommended)
- Once your ALB shows as
active, go back to the Load Balancers section in the EC2 Dashboard. - Select your newly created ALB.
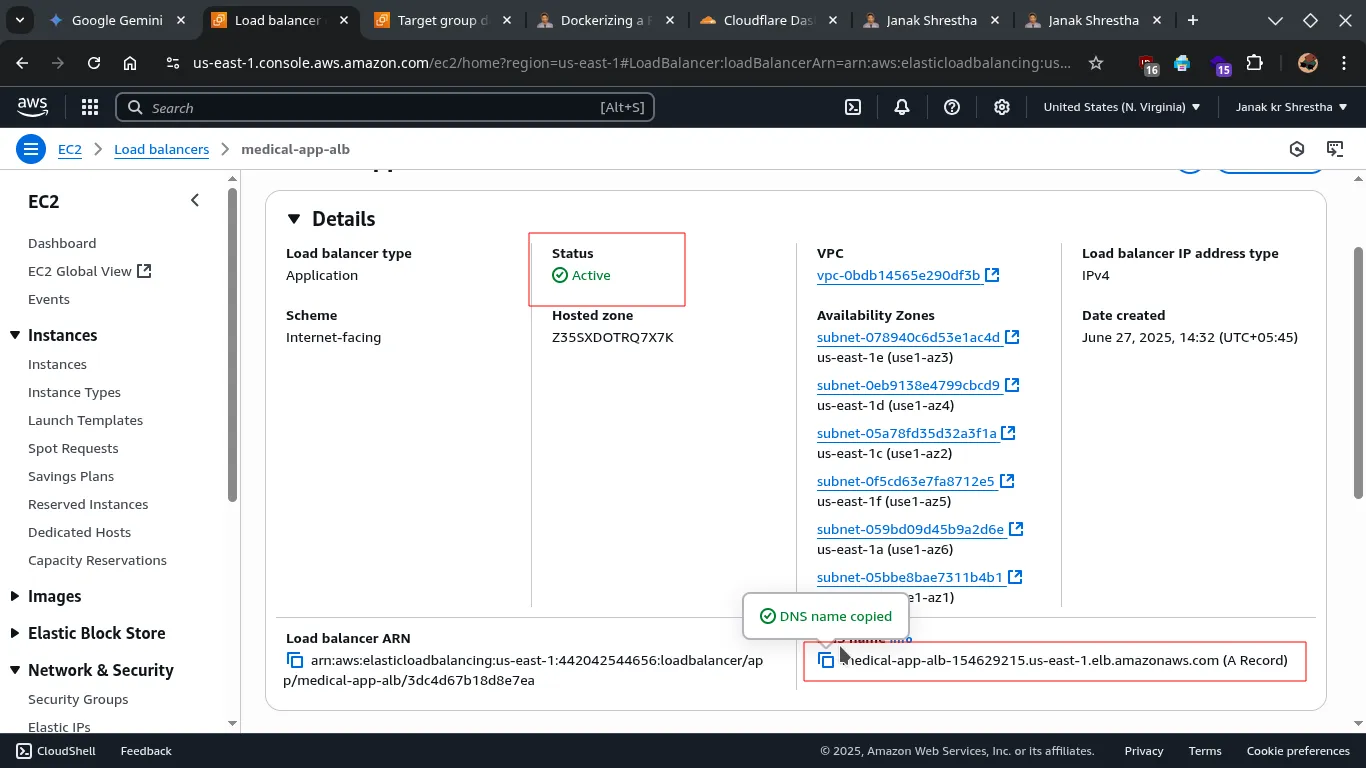
- Copy its DNS name (it will look something like
medical-app-alb-41267975.us-east-1.elb.amazonaws.com).
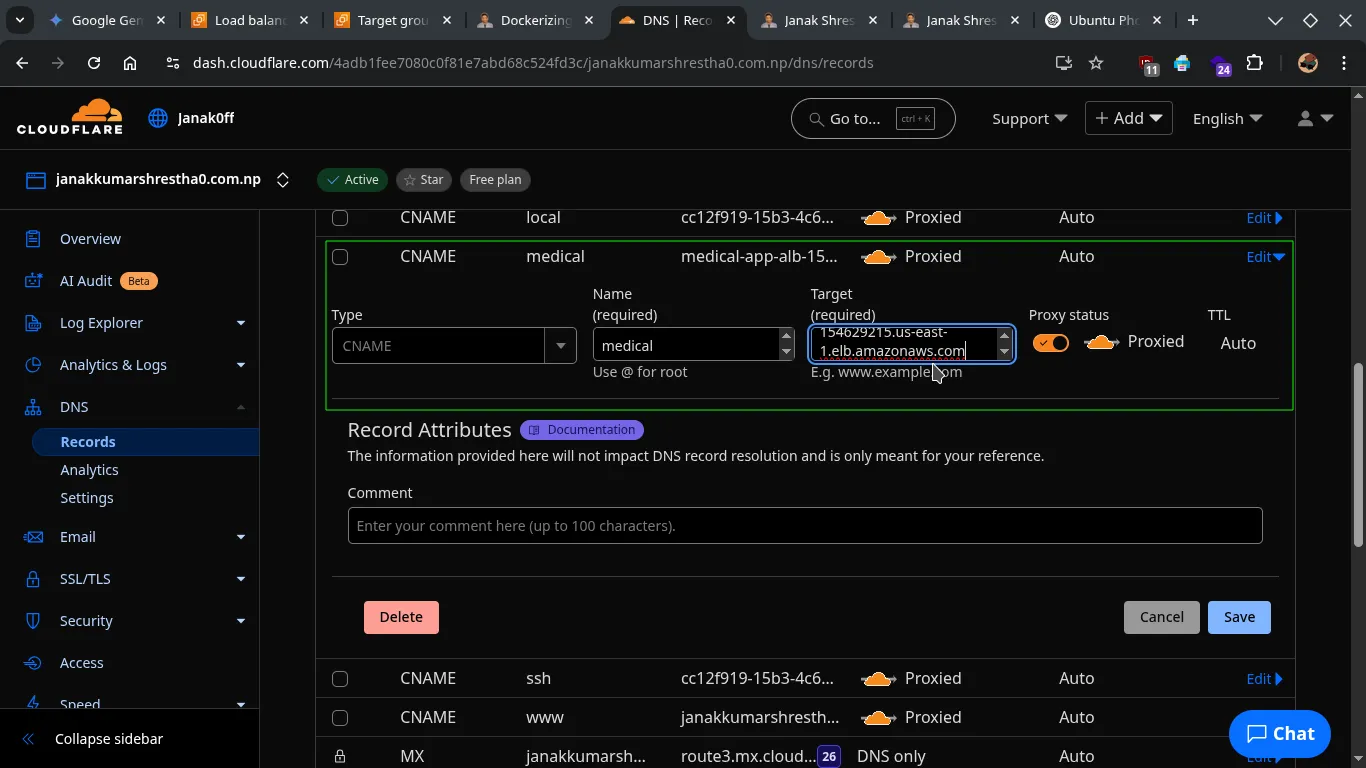
-
- Type:
CNAME - Name:
medical - Target:
medical-app-alb-41267975.us-east-1.elb.amazonaws.com - Save changes.
- Type:
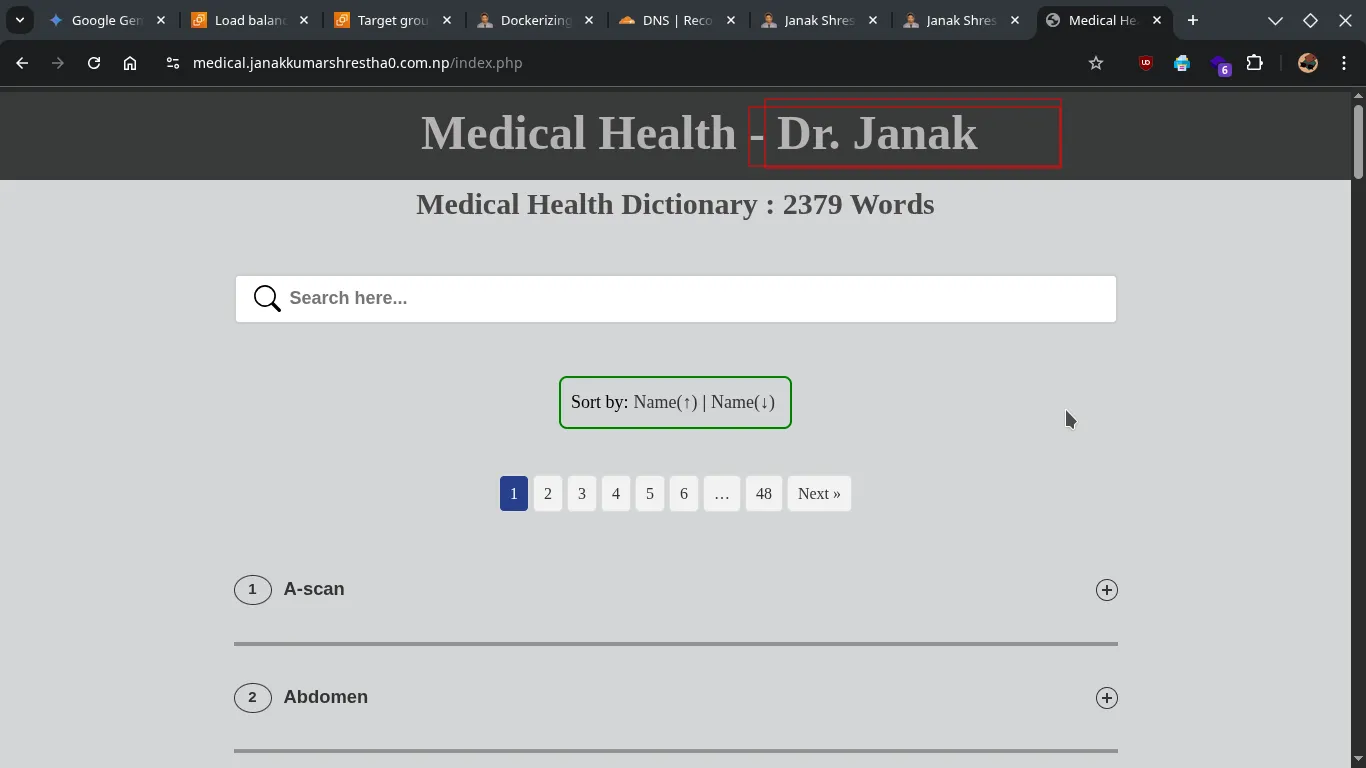
Step 6: Test Your Application
- Open your web browser and navigate to
https://medical.janakkumarshrestha0.com.np. - Your ALB should now be distributing traffic to your healthy backend instances.
-
To confirm load balancing, you can temporarily modify your
index.php(Heading) on each backend server to display a unique heading identifier. Then, refresh the browser multiple times. You should see the heading change, indicating that the ALB is distributing requests. -
Refreshing:
-
Refreshing:
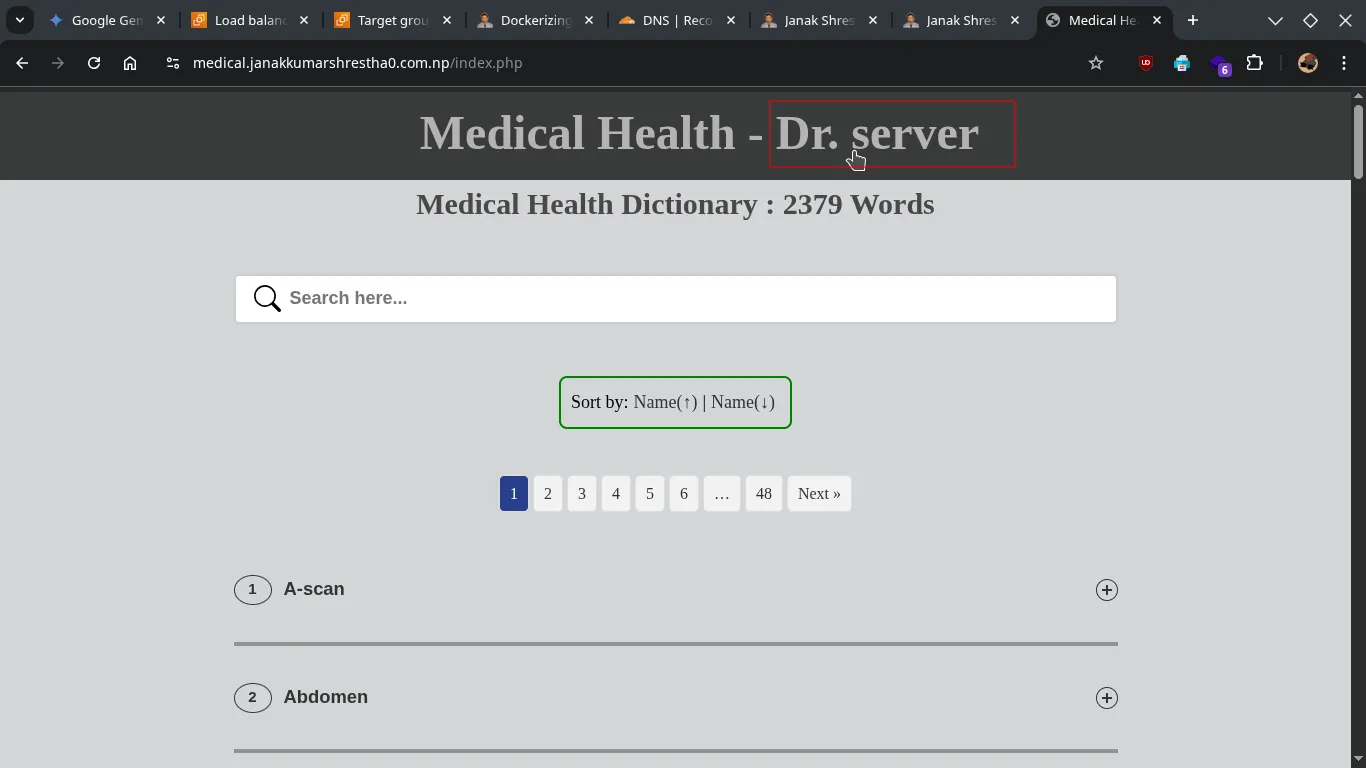
-
Remember to remove these temporary heading identifiers once you’ve confirmed load balancing.