Hosting a static website on AWS S3 is a popular and cost-effective choice for beginners due to its simplicity, scalability, and high availability. Static websites consist of HTML, CSS, JavaScript, and image files – essentially, anything that doesn’t require server-side processing or a database.
Here’s a step-by-step guide to get your static website live on AWS S3:
Step-by-Step Guide:
1. Create an S3 Bucket
- Sign in to the AWS Management Console: Go to https://aws.amazon.com/console/ and log in with your AWS account credentials.
- Navigate to S3: In the search bar at the top, type “S3” and select “S3” under Services.
- Create Bucket: Click on the “Create bucket” button.
- Configure Bucket:
- Bucket name: Enter a globally unique name for your bucket. This name will be part of your website’s URL, so choose something descriptive and easy to remember (e.g.,
my-awesome-static-website-2025). Important: If you plan to use a custom domain later (likewww.yourdomain.com), the bucket name should exactly match your domain name. - AWS Region: Choose a region that is geographically closest to your target audience for better performance.
- Object Ownership: Under “Object Ownership,” choose “ACLs enabled.” This is crucial for making your files publicly accessible later.
- Block Public Access settings for this bucket: Uncheck “Block all public access.” You will get a warning, acknowledge it by checking the box. This allows the bucket to be publicly accessible for your website.
- Leave other settings as default for now (Versioning, Tags, Default encryption).
- Bucket name: Enter a globally unique name for your bucket. This name will be part of your website’s URL, so choose something descriptive and easy to remember (e.g.,
- Create Bucket: Click “Create bucket” at the bottom.
2. Upload Your Website Files
- Open your newly created bucket: From the S3 Buckets list, click on the name of the bucket you just created.
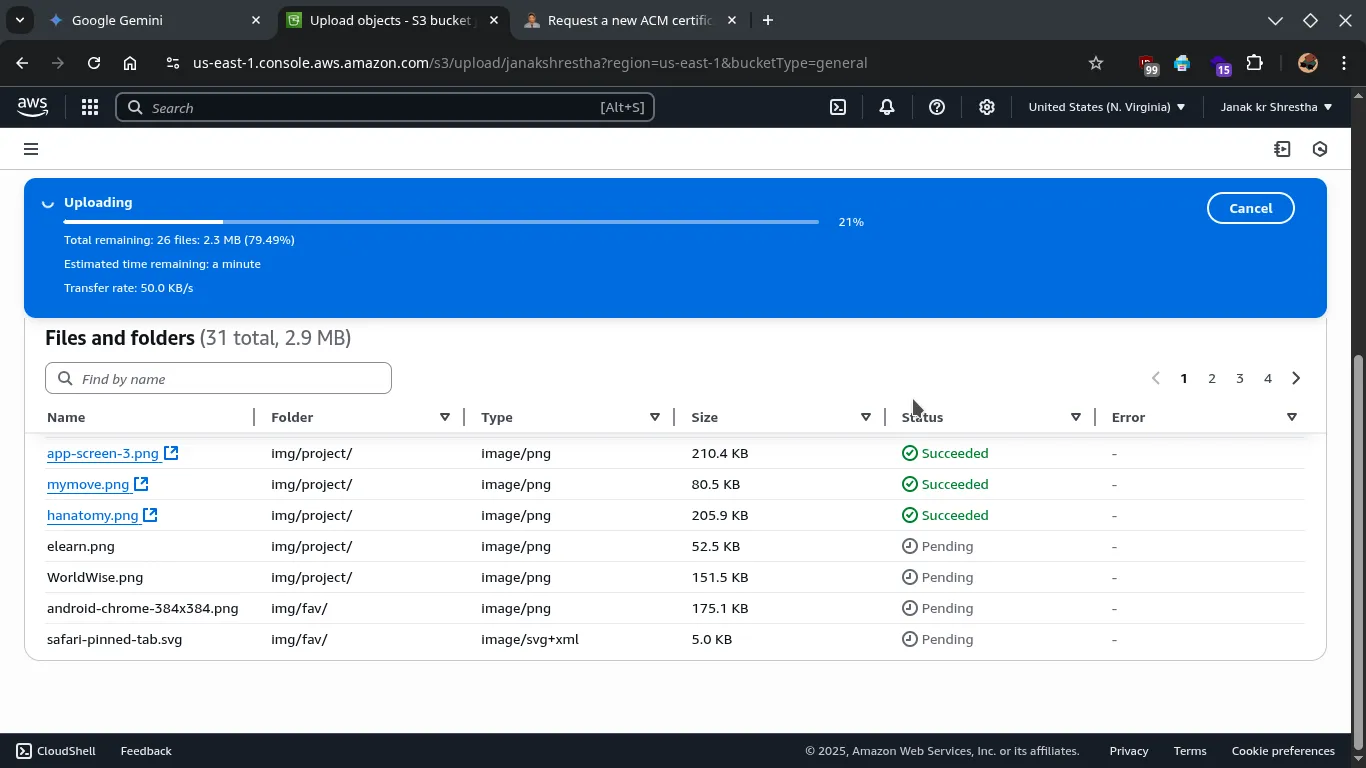
- Upload Files: Click the “Upload” button.
- Add Files/Folders: You can either:
- Drag and drop your website files and folders directly into the upload area.
- Click “Add files” to select individual files.
- Click “Add folder” to upload an entire folder (e.g., your
imagesfolder).
- Upload: Once you’ve added all your website files, click the “Upload” button at the bottom.
3. Enable Static Website Hosting
- Go to the “Properties” tab: Within your S3 bucket, click on the “Properties” tab.
- Scroll down to “Static website hosting”: Click “Edit” next to “Static website hosting.”
- Enable Static Website Hosting:
- Select “Enable.”
- Choose “Host a static website.”
- Index document: Enter
index.html(or whatever your main HTML file is named). This is the default page that will load when someone visits your website. - Error document (optional): If you have a custom
error.htmlpage for 404 errors, enter its name here. Otherwise, you can leave it blank.
- Save Changes: Click “Save changes.”
- Note the Endpoint URL: After saving, scroll down again to “Static website hosting.” You will see a “Bucket website endpoint” URL (e.g.,
http://your-bucket-name.s3-website-region.amazonaws.com). This is the URL where your website will be accessible. Copy this URL.

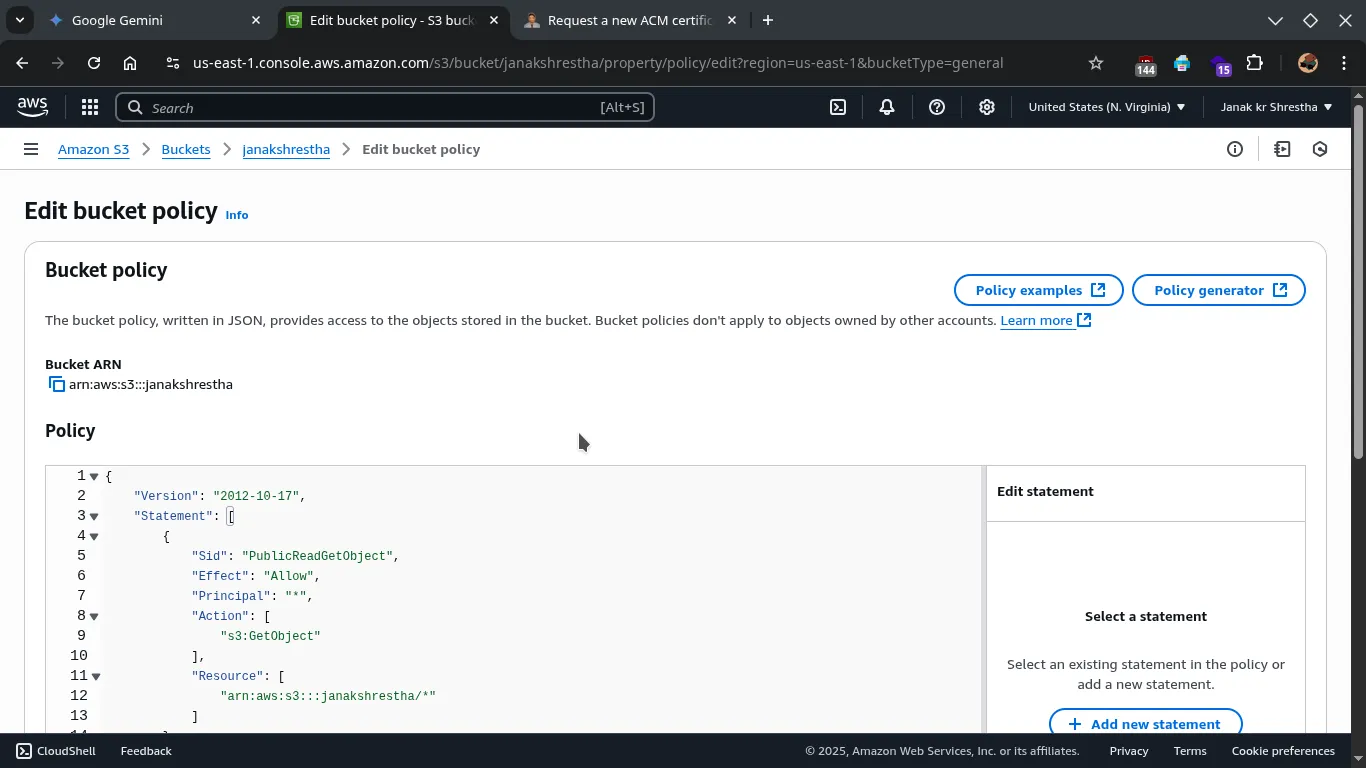
4. Set Bucket Policy for Public Read Access
Even though you unchecked “Block all public access” earlier, you still need a bucket policy to explicitly grant public read access to your website files.
-
Go to the “Permissions” tab: Within your S3 bucket, click on the “Permissions” tab.
-
Scroll down to “Bucket policy”: Click “Edit” next to “Bucket policy.”
-
Add a Bucket Policy: Paste the following JSON policy into the editor. Remember to replace
YOUR_BUCKET_NAMEwith the actual name of your S3 bucket.{ "Version": "2012-10-17", "Statement": [ { "Sid": "PublicReadGetObject", "Effect": "Allow", "Principal": "*", "Action": [ "s3:GetObject" ], "Resource": [ "arn:aws:s3:::YOUR_BUCKET_NAME/*" ] } ] }"Principal": "*": This means anyone (public) can access your files."Action": ["s3:GetObject"]: This grants permission to retrieve (read) objects."Resource": "arn:aws:s3:::YOUR_BUCKET_NAME/*": This applies the policy to all objects (/*) within your specified bucket.
-
Save Changes: Click “Save changes.”
5. Make Objects Public (using ACLs) - optional
While the bucket policy grants public read access, you also need to ensure that the objects themselves (your individual files) are publicly readable.
- Go to the “Objects” tab: Within your S3 bucket, click on the “Objects” tab.
- Select all objects: Select all your uploaded files and folders (you can check the box next to “Name” to select all).
- Actions -> Make public: Click on the “Actions” dropdown menu, then choose “Make public using ACL.”
- Confirm: Confirm your action when prompted.
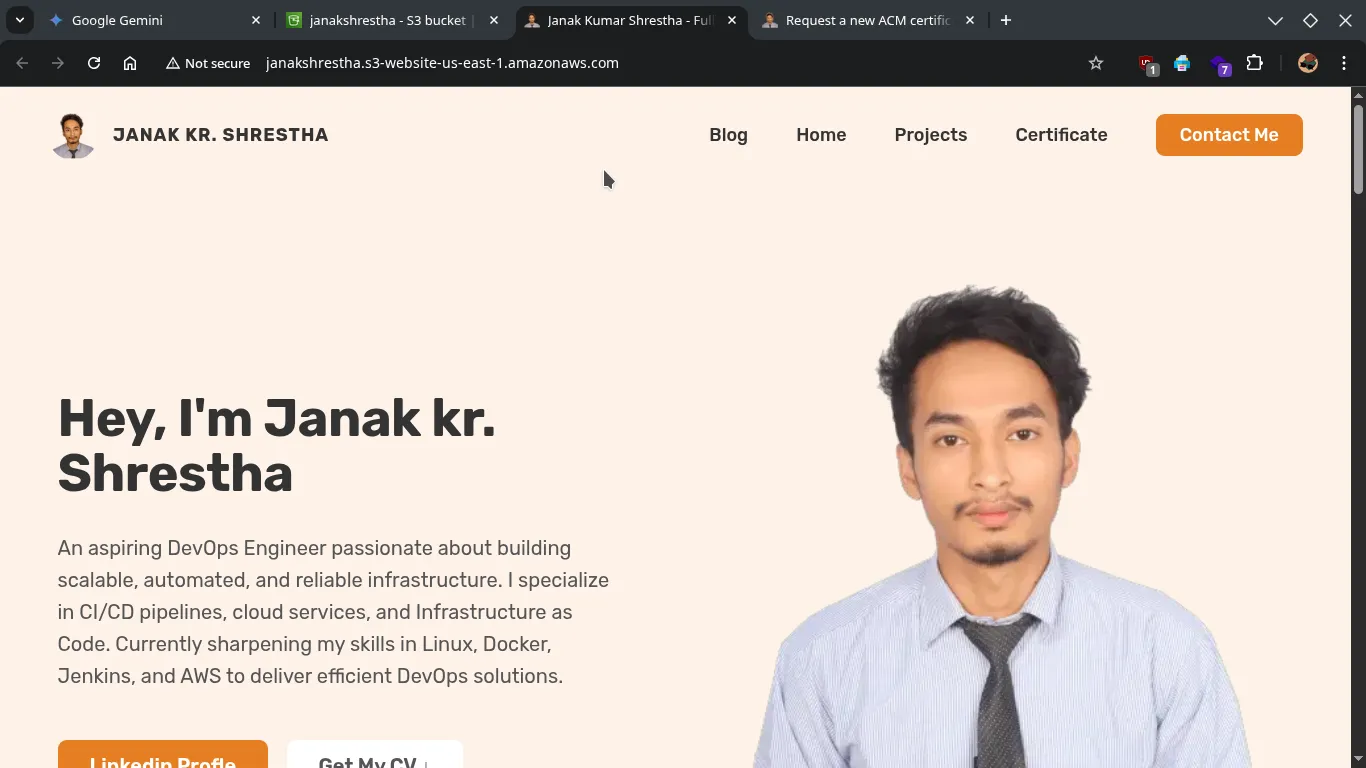
6. Access Your Website!
- Paste the “Bucket website endpoint” URL you copied in Step 3 into your web browser.
- You should now see your static website live on the internet.
http://janakshrestha.s3-website-us-east-1.amazonaws.com
Important Considerations for Beginners:
- Costs: S3 is very cost-effective for static websites. You’ll primarily pay for storage (per GB) and data transfer out of S3. For low-traffic personal websites, the costs will likely be minimal, and often within the Free Tier limits.
- HTTPS (SSL/TLS): The direct S3 website endpoint serves content over HTTP (unencrypted). For a secure website with HTTPS, you’ll typically use AWS CloudFront (a Content Delivery Network or CDN) in front of your S3 bucket. CloudFront provides HTTPS, caching, and better performance globally. This is a good next step once you’re comfortable with the basic S3 setup.
- Custom Domains: To use your own domain name (e.g.,
www.yourdomain.com) instead of the S3 endpoint, you’ll need to configure DNS records (CNAME) with your domain registrar to point to your S3 website endpoint or, more commonly and preferably, to a CloudFront distribution. - Updates: To update your website, simply upload the new or modified files to your S3 bucket, overwriting the old ones.
- Error Troubleshooting: If you encounter “Access Denied” errors, double-check your bucket policy and ensure all objects are publicly accessible (Step 4 and 5). Also, verify the index and error document names in your static website hosting settings.
Congratulations! You’ve successfully hosted your first static website on AWS S3.