- 📦 Read Before: 👉 Deploying Your PHP and MySQL App on AWS EC2 with Docker, Nginx, SSL and a Custom Domain
Primary Ubuntu server instances will act as both an application server and the Nginx load balancer.
Architecture with Nginx Load Balancer on a Backend Instance:
                                      Internet
                                         |
                                         |
                           Custom Domain (medical.janakkumarshrestha0.com.np)
                                         |
                                         V
                          AWS EC2 Instance "A" (Primary/Nginx LB + App)
                          (Public IP: XX.XX.XX.XX)
                          (Listens on 80/443, proxies to backends)
                                         |
                                         | (Internal Network / Security Group)
                                         V
                         +-----------------------------------+
                         |                                   |
                  EC2 Instance "A" (itself)           AWS EC2 Instance "B" (Backend App)
                  (Private IP: 10.0.0.10)             (Private IP: 10.0.0.11)
                  [Dockerized PHP App on 8899]        [Dockerized PHP App on 8899]
                         |                                   |
                         V                                   V
                 (Docker containers)                 (Docker containers)
Steps:
Step 1: Identify Your “Primary” EC2 Instance
Choose one of your existing Ubuntu EC2 instances. This will be your “Primary” instance where Nginx will be configured as the load balancer. Let’s call it EC2 Instance A. The other instances will be EC2 Instance B, C, etc.
Step 2: Ensure Dockerized App is Running on All Instances
For all your EC2 instances (Instance A, Instance B, etc.):
- SSH into each instance and verify that your Dockerized PHP application is running and accessible on port
8899internally.ssh -i /path/to/your/key.pem ubuntu@your_ec2_public_ip cd /home/ubuntu/your_app_name # Your app directory docker-compose up -d # Ensure it's running docker ps # Verify web and db containers are up curl http://localhost:8899 # Should show your app's content
Step 3: Configure Security Groups
This is crucial for ensuring Nginx can talk to all backend app servers, and only Nginx is public-facing.
1. Security Group for “Primary” EC2 Instance (Instance A):
-
Inbound Rules:
- SSH (Port 22): From your IP (or Anywhere for testing).
- HTTP (Port 80): From Anywhere (0.0.0.0/0).
- HTTPS (Port 443): From Anywhere (0.0.0.0/0).
- Optional (if needed for internal communication beyond load balancing): If your app instances share a security group, you might have an existing rule allowing the security group to talk to itself on port 8899, which would cover the Nginx LB instance connecting to its own Docker app.
-
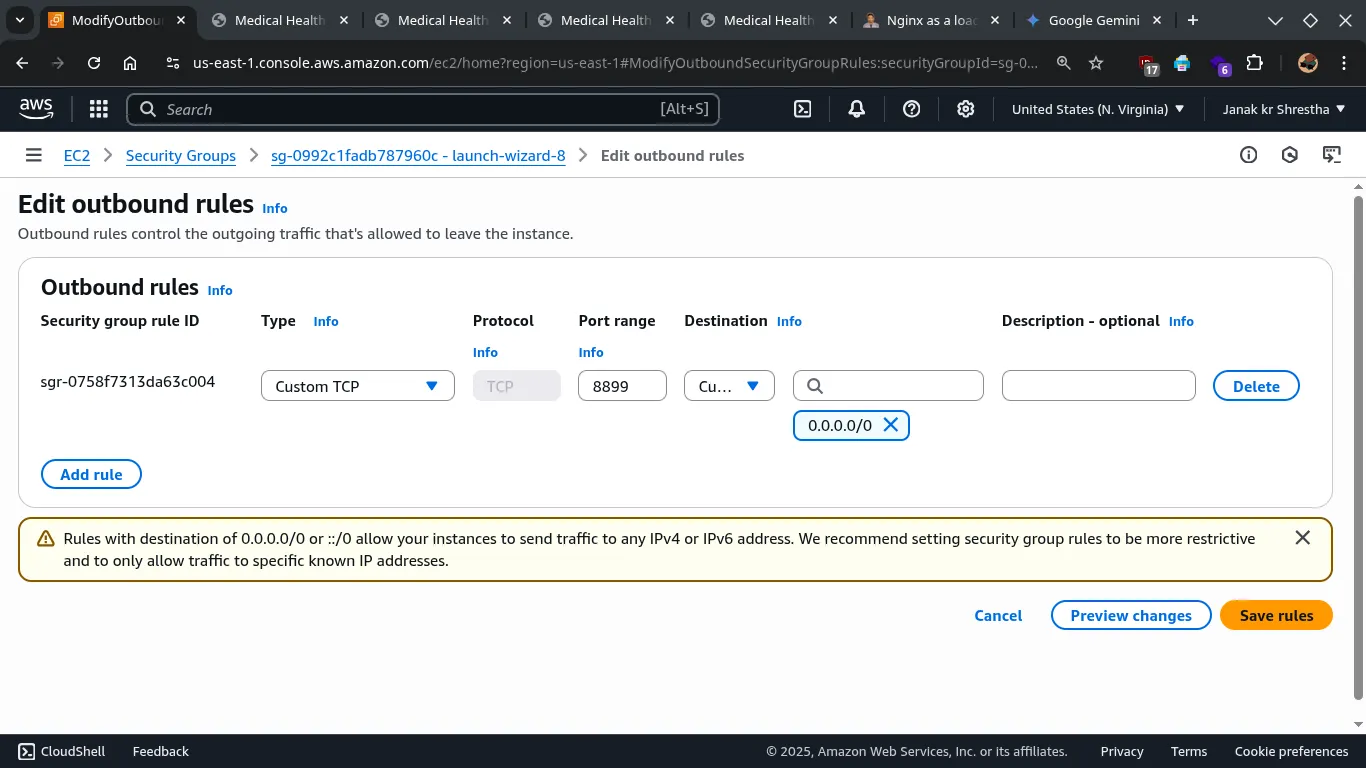
Outbound Rules:
- Allow traffic to your backend instances (your other EC2 instances, and itself) on Custom TCP 8899. The most secure way is to set the destination to the Security Group ID of your backend instances (if they share one). Alternatively, you could whitelist the private IPs of all your backend instances individually.
2. Security Group for All Other Backend EC2 Instances (Instance B, C, etc.):
- Inbound Rules:
- SSH (Port 22): From your IP (or Anywhere for testing).
- Custom TCP (Port 8899): This is absolutely crucial. Allow inbound traffic on port 8899 ONLY from the private IP address of your “Primary” Nginx LB EC2 instance (Instance A), or from its Security Group ID. DO NOT open 8899 to 0.0.0.0/0.
- Crucial: Remove any existing rules for HTTP (80) or HTTPS (443) that allow traffic from Anywhere. These instances should not be directly accessible from the internet.
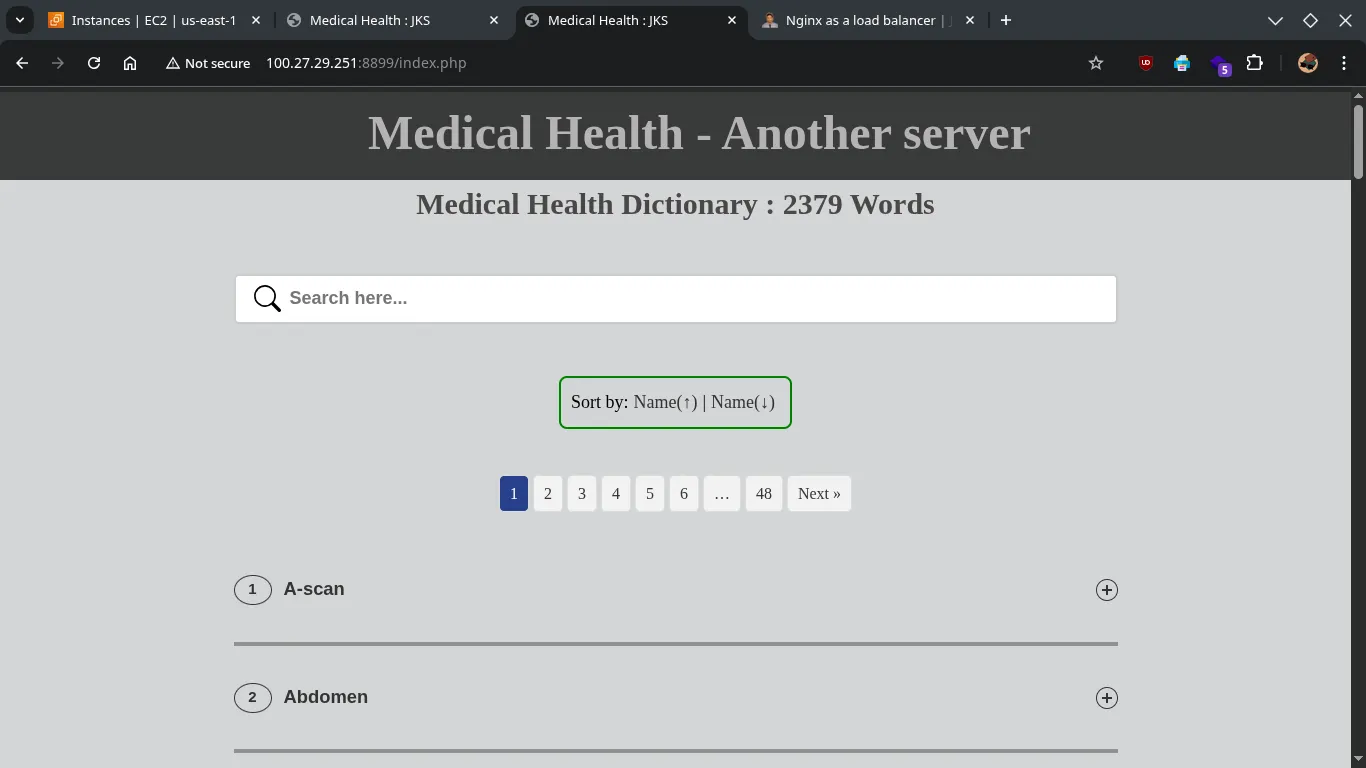
Test the application directly by ip (optional, if port 8899 is open):
Open your web browser and navigate to http://your_ec2_public_ip:8899 , http://100.27.29.251:8899/. You should see your PHP application.
Step 4: Configure Nginx as a Load Balancer on “Primary” EC2 Instance (Instance A)
This is where the load balancing configuration goes.
-
SSH into your “Primary” EC2 Instance (Instance A).
ssh -i /path/to/your/key.pem ubuntu@your_primary_ec2_public_ip -
Ensure Nginx and Certbot are installed and updated:
sudo apt update -y sudo apt install -y nginx certbot python3-certbot-nginx sudo systemctl start nginx sudo systemctl enable nginx -
Edit your Nginx site configuration file:
sudo nano /etc/nginx/sites-available/medical.janakkumarshrestha0.com.np -
Modify the content as follows (add
upstreamand adjustproxy_pass):# Define the upstream group for your PHP web application instances # Include all your backend servers, including this instance's own app upstream backend_php_app { # This instance's own Docker container: server 127.0.0.1:8899; # Add all your OTHER backend instances' PRIVATE IP addresses here: server 100.27.29.251:8899; # Example: Private IP of EC2 Instance B # server 10.0.0.12:8899; # Example: Private IP of EC2 Instance C # ... add more as needed # Optional: Choose a load balancing method (uncomment one) # least_conn; # Distributes requests to the server with the fewest active connections # ip_hash; # Ensures requests from the same IP go to the same server (useful for sticky sessions) } # HTTP server block (for redirecting to HTTPS and Certbot validation) server { listen 80; listen [::]:80; server_name medical.janakkumarshrestha0.com.np; # Certbot automatically adds the HTTP to HTTPS redirect here later # If you've already run Certbot, this should already be present: return 301 https://$server_name$request_uri; } # HTTPS server block server { listen 443 ssl http2; listen [::]:443 ssl http2; server_name medical.janakkumarshrestha0.com.np; # Certbot will automatically fill these paths after you run it ssl_certificate /etc/letsencrypt/live/medical.janakkumarshrestha0.com.np/fullchain.pem; ssl_certificate_key /etc/letsencrypt/live/medical.janakkumarshrestha0.com.np/privkey.pem; include /etc/letsencrypt/options-ssl-nginx.conf; ssl_dhparam /etc/letsencrypt/ssl-dhparams.pem; location / { proxy_pass http://backend_php_app; # <<--- VERY IMPORTANT: Proxy to the upstream group proxy_set_header Host $host; proxy_set_header X-Real-IP $remote_addr; proxy_set_header X-Forwarded-For $proxy_add_x_forwarded_for; proxy_set_header X-Forwarded-Proto $scheme; # Recommended for PHP applications behind a proxy/load balancer proxy_connect_timeout 600s; proxy_send_timeout 600s; proxy_read_timeout 600s; send_timeout 600s; proxy_buffering off; # Avoids caching proxy responses which can be problematic for dynamic content proxy_cache off; } } -
Save the file and exit (
Ctrl+X,Y,Enter). -
Test Nginx configuration and restart:
sudo nginx -t
sudo systemctl restart nginx
Step 5: Configure DNS Records (Route 53 or your DNS Provider)
- Go to your DNS manager for
janakkumarshrestha0.com.np. - Edit your
medical.janakkumarshrestha0.com.npA record:- Type:
A - Name:
medical - Value/Points to: The Public IPv4 Address of your “Primary” EC2 Instance (Instance A).
- Type:
Step 6: Secure with SSL (Certbot) on “Primary” Instance
- If you haven’t already, or if the config was changed significantly, run Certbot on the “Primary” EC2 Instance (Instance A):
Follow the prompts, selecting to redirect HTTP to HTTPS. This ensures the SSL certificate is installed on the instance handling public HTTPS traffic.sudo certbot --nginx -d medical.janakkumarshrestha0.com.np
Step 7: Test Your Load Balancer
- Open your browser and navigate to
https://medical.janakkumarshrestha0.com.np. - To confirm load balancing, you can temporarily modify your
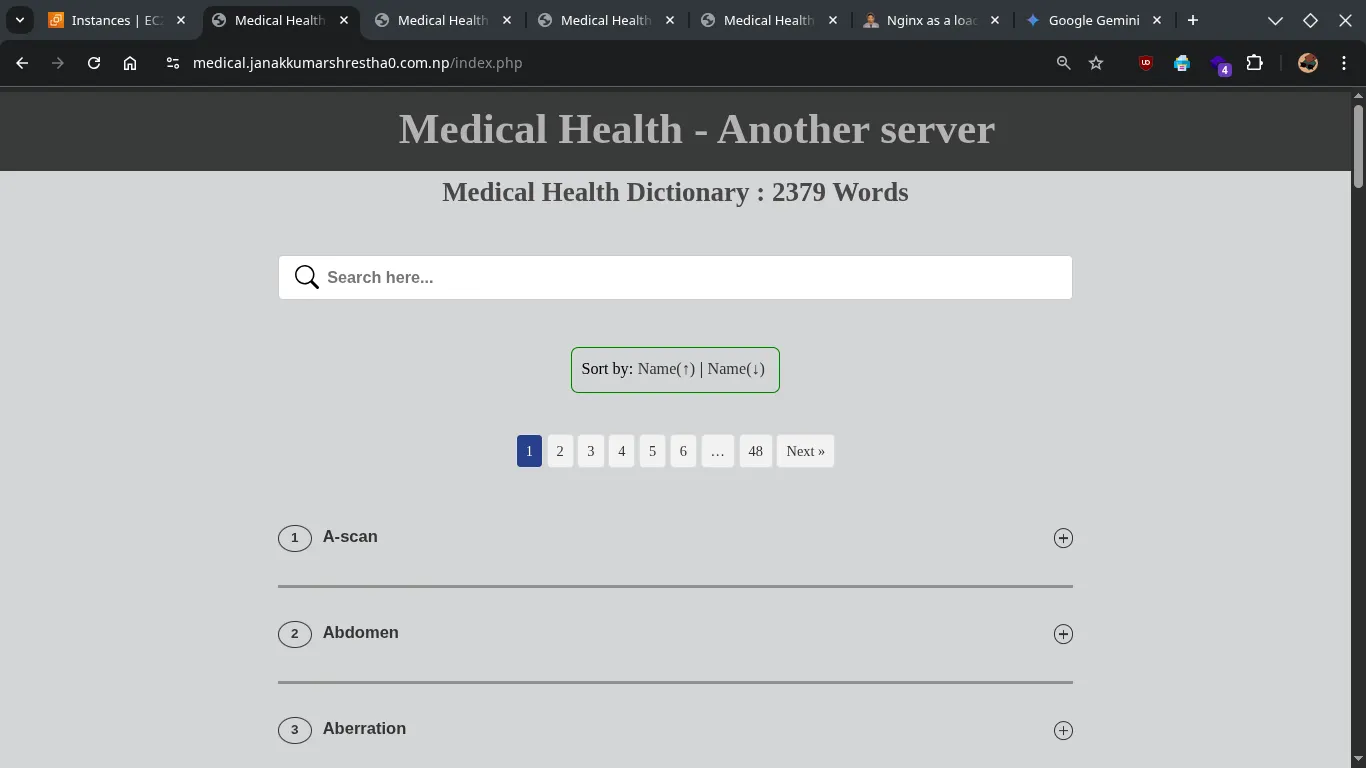
index.phpon each backend server to display its private IP address or a unique identifier (e.g., “Served by Instance A”, “Served by Instance B”). - In my case I have modified the heading
Medical Health - Another serverin second instance andMedical Health - Dr. Janakis in my primary instance. - Refresh
https://medical.janakkumarshrestha0.com.np. You should see the heading message change, indicating that Nginx is distributing requests across all your backend instances.
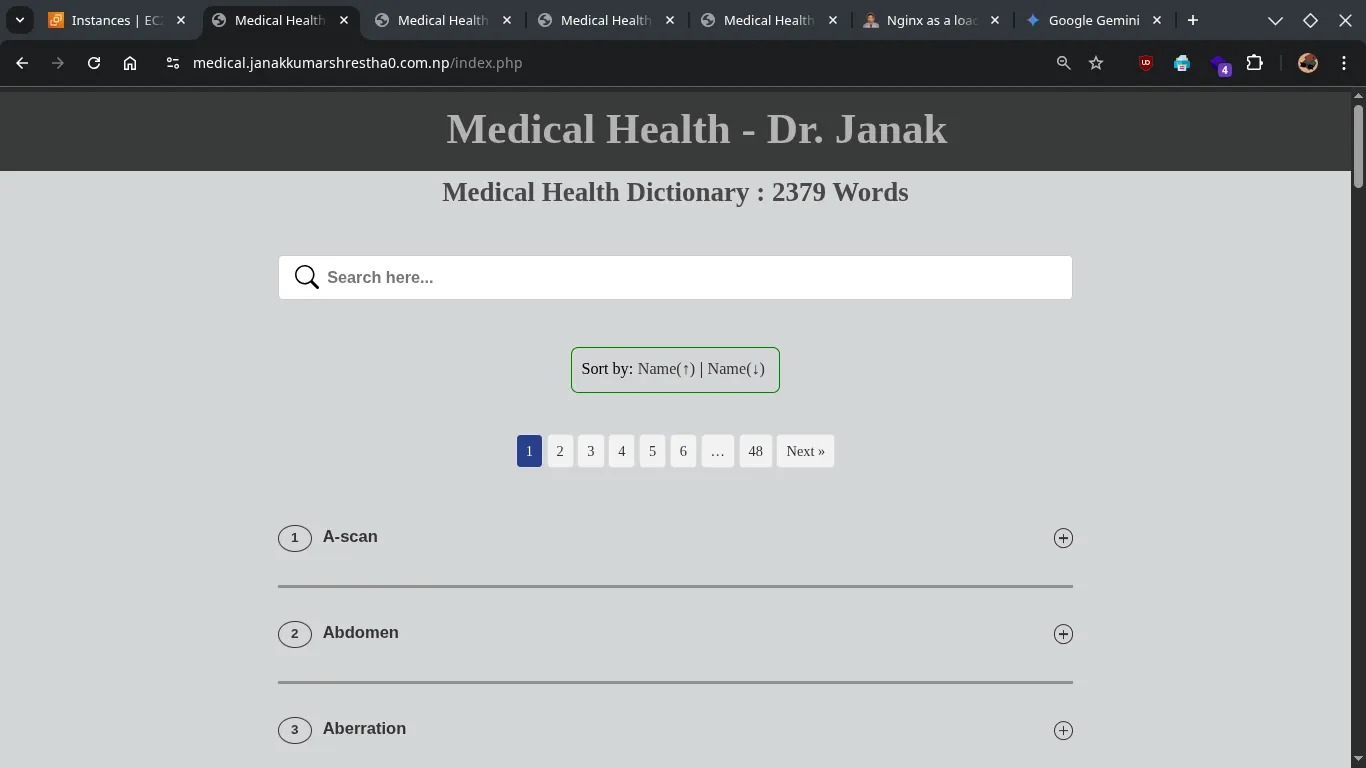
- Boom..!