What is NFS?
NFS (Network File System) allows Linux systems to share directories and files with others over a network. It is commonly used for centralizing storage and making files accessible to multiple machines.
NFS Architecture
- NFS Server: The machine that shares its directories.
- NFS Client: The machine that mounts and accesses the shared directories.
Prerequisites
- Two Linux machines on the same network.
Setting Up NFS: Step-by-Step
1. Install NFS Packages
On Ubuntu/Debian:
sudo apt update
sudo apt install nfs-kernel-server nfs-common
On CentOS/Fedora/RHEL:
sudo yum install nfs-utilsnfs-kernel-server: Provides the NFS server functionality.nfs-common/nfs-utils: Provides client utilities.
2. Create a Directory to Share
sudo mkdir -p /srv/nfs/shared
sudo chown nobody:nogroup /srv/nfs/shared
sudo chmod 777 /srv/nfs/sharedchownandchmod: Set permissions so all clients can access it.
3. Configure NFS Exports
Edit the exports file:
sudo nano /etc/exportsAdd a line like:
/srv/nfs/shared 192.168.1.0/24(rw,sync,no_subtree_check)rw: Read/write access.sync: Writes changes to disk before replying.no_subtree_check: Disables subtree checking for better performance.- Replace
192.168.1.0/24with your network | subnet.
4. Export the Shared Directory
sudo exportfs -ra-ra: Re-exports all directories listed in/etc/exports.
5. Start and Enable NFS Server
sudo systemctl enable --now nfs-server- Starts the NFS server and enables it at boot.
6. Adjust Firewall (if enabled)
On Ubuntu:
sudo ufw allow from 192.168.1.0/24 to any port nfs192.168.1.0replace with your own ip/subnet ip
On CentOS/Fedora:
sudo firewall-cmd --permanent --zone=public --add-service=nfs
sudo firewall-cmd --reload- Allows NFS traffic through the firewall.
7. Check NFS Exports
showmount -e- Lists exported directories on the server.
NFS Client Configuration
1. Install NFS Client Utilities
On Ubuntu/Debian:
sudo apt install nfs-commonOn CentOS/Fedora/RHEL:
sudo yum install nfs-utils- Installs the client-side tools.
2. Mount the NFS Share
sudo mkdir -p /mnt/nfs-client
sudo mount -t nfs 192.168.1.100:/srv/nfs/shared /mnt/nfs-client- Replace
192.168.1.100with the server’s IP address. /mnt/nfs-clientis the local mount point.
3. Make the Mount Permanent
Edit /etc/fstab:
sudo nano /etc/fstabAdd:
192.168.1.100:/srv/nfs/shared /mnt/nfs-client nfs defaults 0 0- Ensures the share mounts at boot.
4. Unmount the NFS Share
sudo umount /mnt/nfs-client- Unmounts the share from the client.[10]
Export Options
ro: Read-only access.no_root_squash: Allows root on client to act as root on server (use with caution).all_squash: Maps all client users to anonymous user.anonuid/anongid: Set UID/GID for anonymous users.
NFS Versions
- NFSv3: Widely supported, stateless.
- NFSv4: Improved security, stateful, supports ACLs and pseudo-root.
Security Best Practices
- Restrict access to trusted IPs.
- Use firewalls to limit NFS ports.
- Prefer NFSv4 for better security features.
Troubleshooting
- Check NFS status:
sudo systemctl status nfs-server - View logs:
journalctl -xe | grep nfs - Test connectivity:
showmount -e 192.168.1.100 - Remount all:
sudo mount -a - Check permissions: Ensure directory and export permissions are correct.
Example: Full Workflow
On Server:
sudo apt install nfs-kernel-server
sudo mkdir -p /srv/nfs/shared
sudo chown nobody:nogroup /srv/nfs/shared
sudo chmod 777 /srv/nfs/shared
echo "/srv/nfs/shared 192.168.1.0/24(rw,sync,no_subtree_check)" | sudo tee -a /etc/exports
sudo exportfs -ra
sudo systemctl enable --now nfs-server
On Client:
sudo apt install nfs-common
sudo mkdir -p /mnt/nfs-client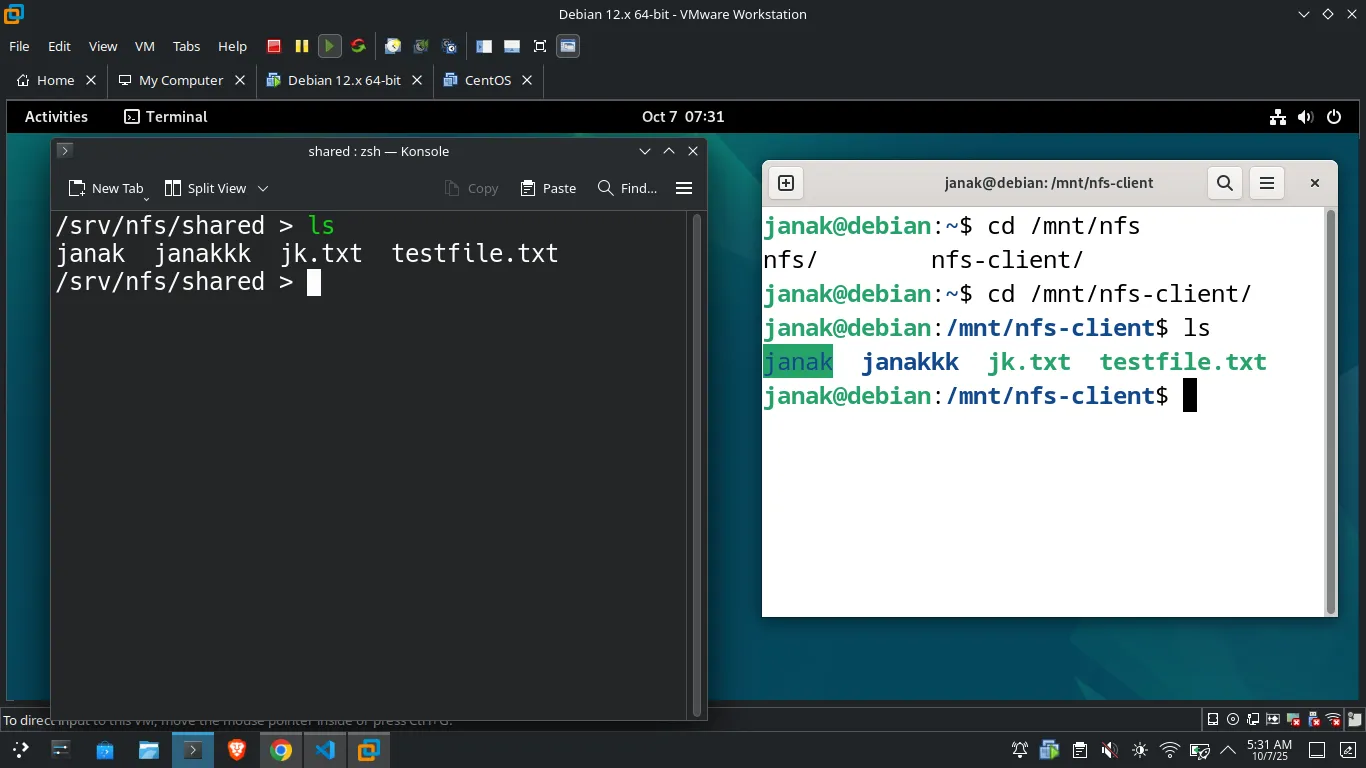
sudo mount -t nfs 192.168.1.100:/srv/nfs/shared /mnt/nfs-client- Now, files placed in
/srv/nfs/sharedon the server will appear in/mnt/nfs-clienton the client.